Baked Apples

Tags

, , , ,

I think I’ll always love baked apples because they remind me of my childhood. My mum is a good cook but a self-confessed terrible baker and as a result, these were the only pudding i remember having with any frequency at home. Baking is a bit like Marmite i always think, you either love it, or you hate it. If you’re a little bit anally retentive (like me) chances are you’ll love it, all that weighing and measuring and the knowledge that if you stick to the plan, you’ll end up with something great every time is very reassuring. If, on the other hand you’re a little more slapdash in the kitchen (like both my mother and my boyfriend) then chances are you’ll hate it. They both find it far too rigid and precise and simply don’t have the patience. No matter which category you fall into however, you’ll love these. There’s something so comforting about their simplicity and the fact that they’re healthy is a huge bonus as most of the sweetness comes from the dried fruit. They’re also something you can so easily change according to your mood and what’s knocking around in the cupboard. Swap the raisins for dates, the sugar for honey, add some rosewater, some chopped almonds and if you’re feeling decadent, replace the yoghurt with cream – whatever takes your fancy. I would like to point out that the rum is my own addition, my brother and i weren’t routinely fed boozy apples in an attempt to shut us up in the evenings! If you’re making these for children then simply leave the rum out and add either a splash of fruit juice or water if the mixture looks too dry.

Baked Apples with Greek Yoghurt

  • 2 baking apples (such as Bramley)
  • 100g raisins
  • 1 dessertspoonful brown sugar
  • pinch of cinnamon
  • good slug of rum
  • Greek yoghurt to serve (I used a 170g tub of 2% fat total greek yoghurt)

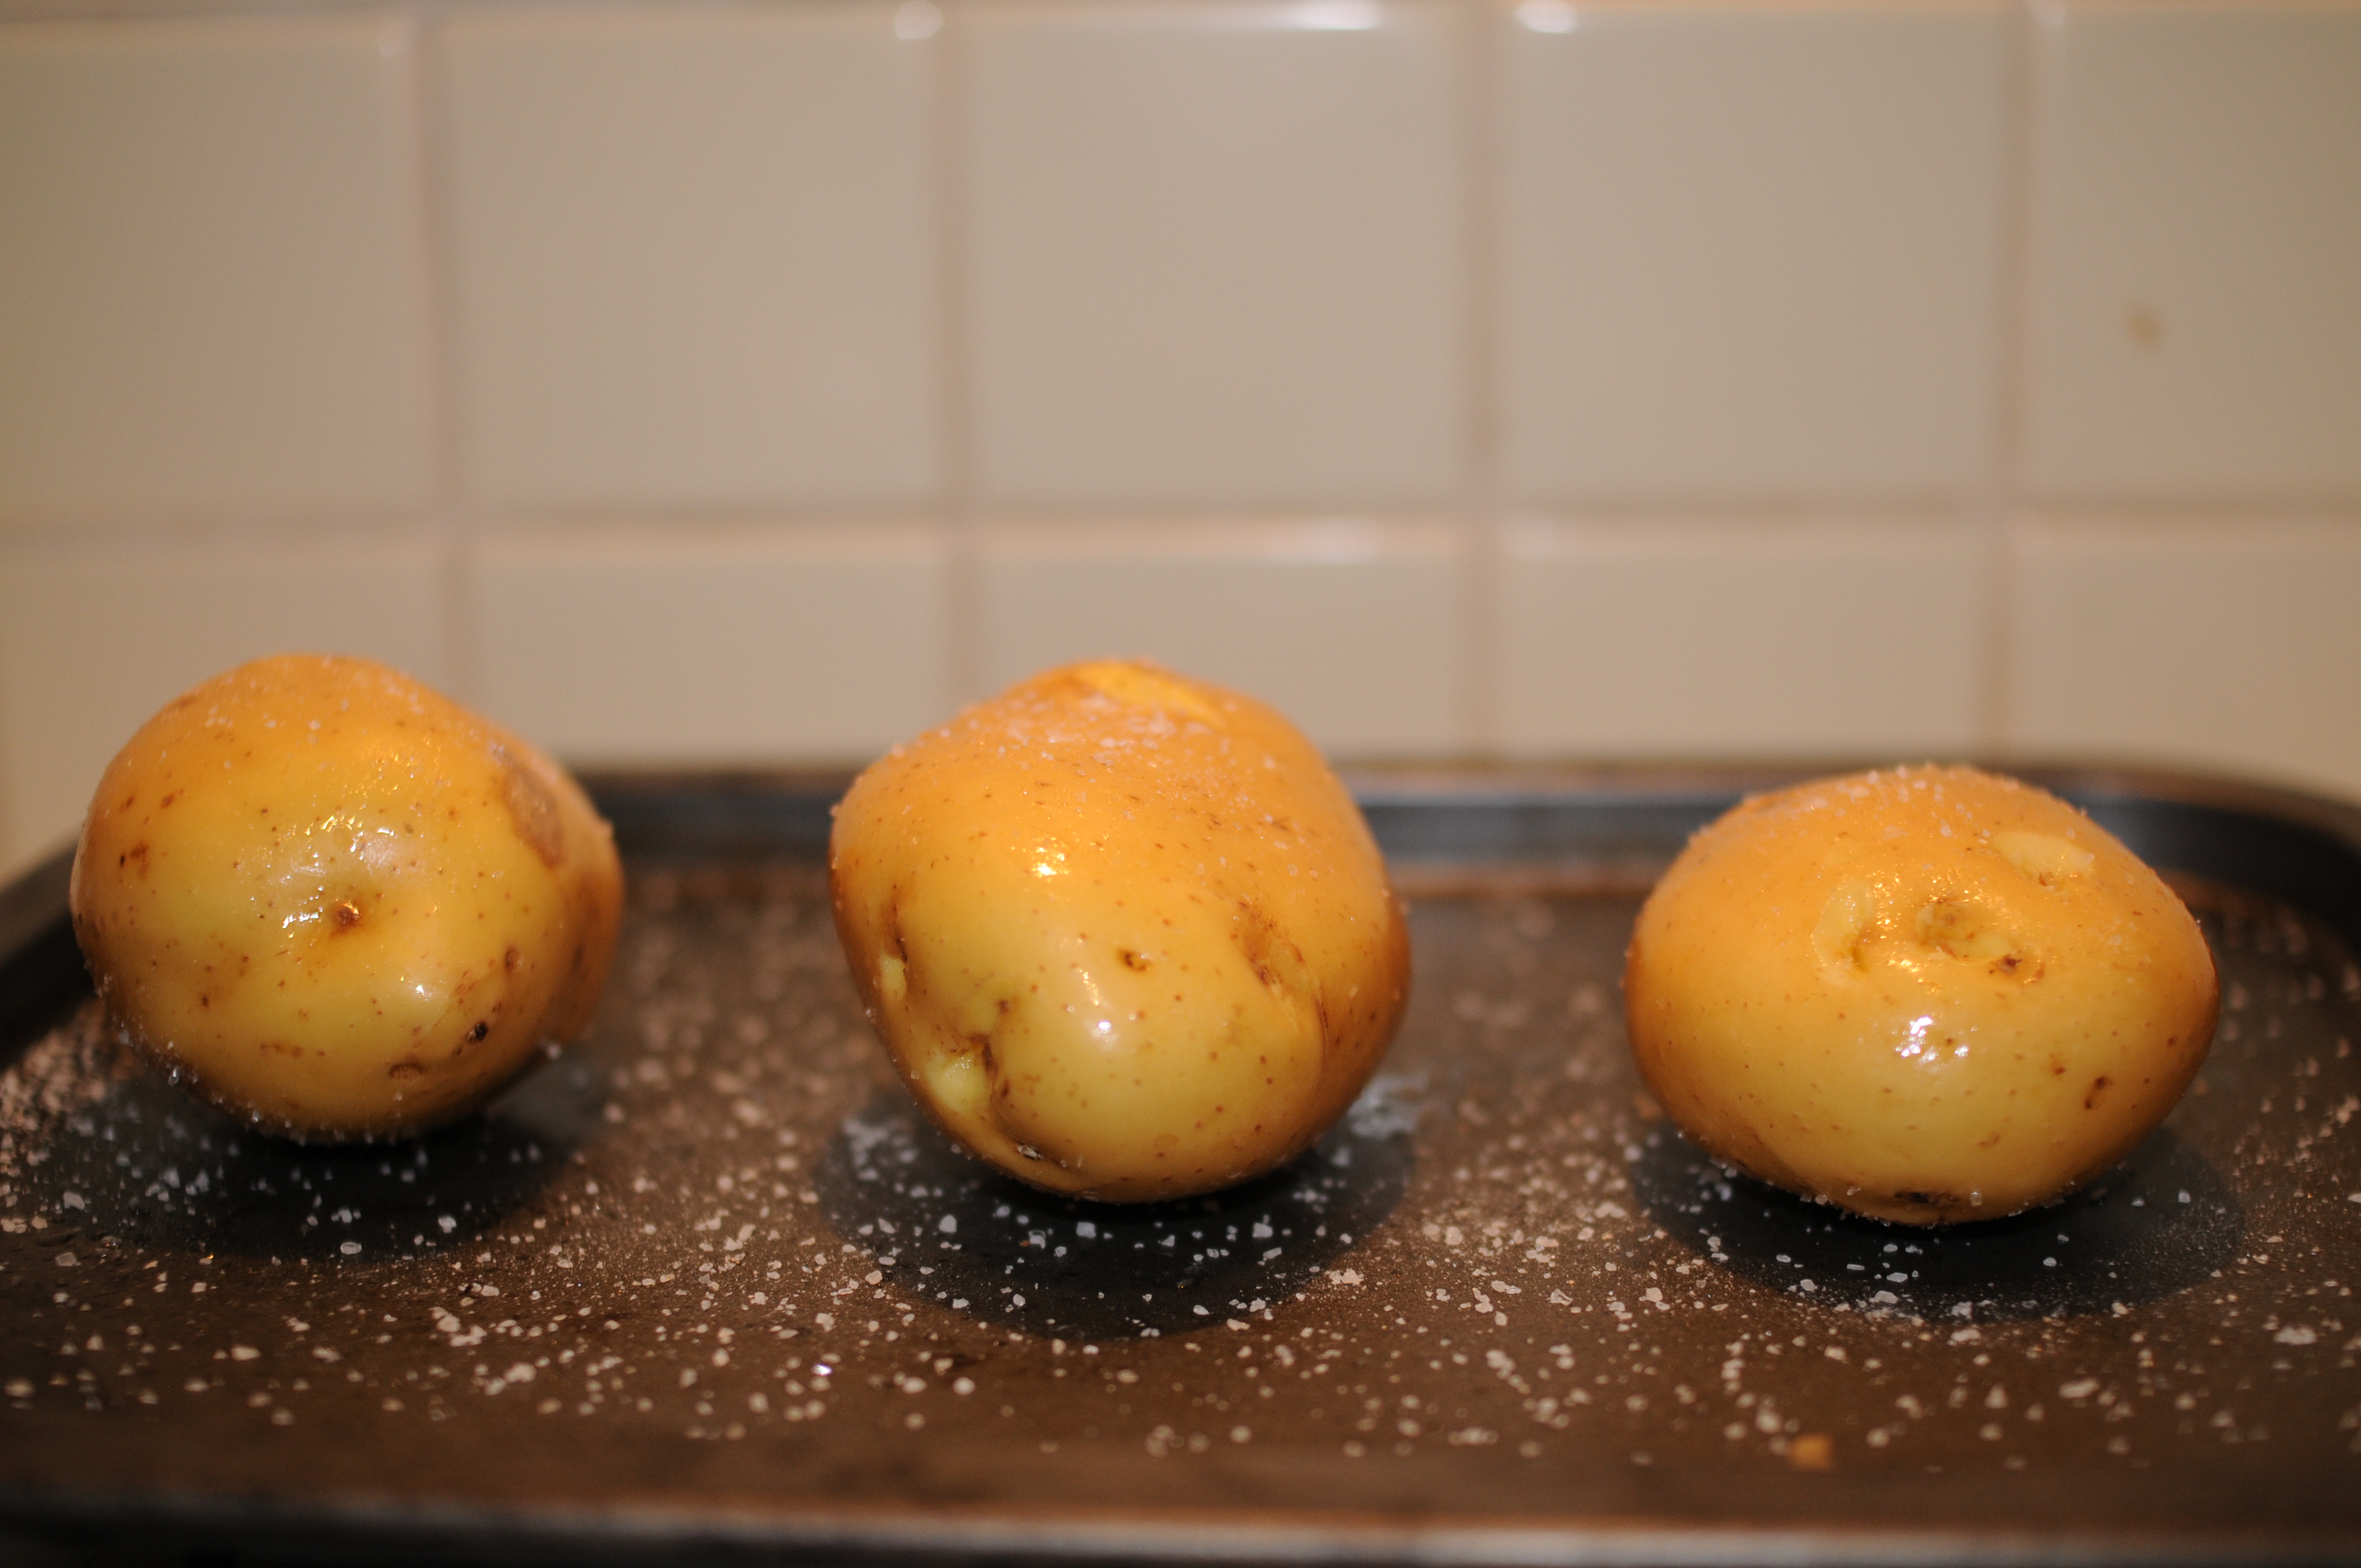
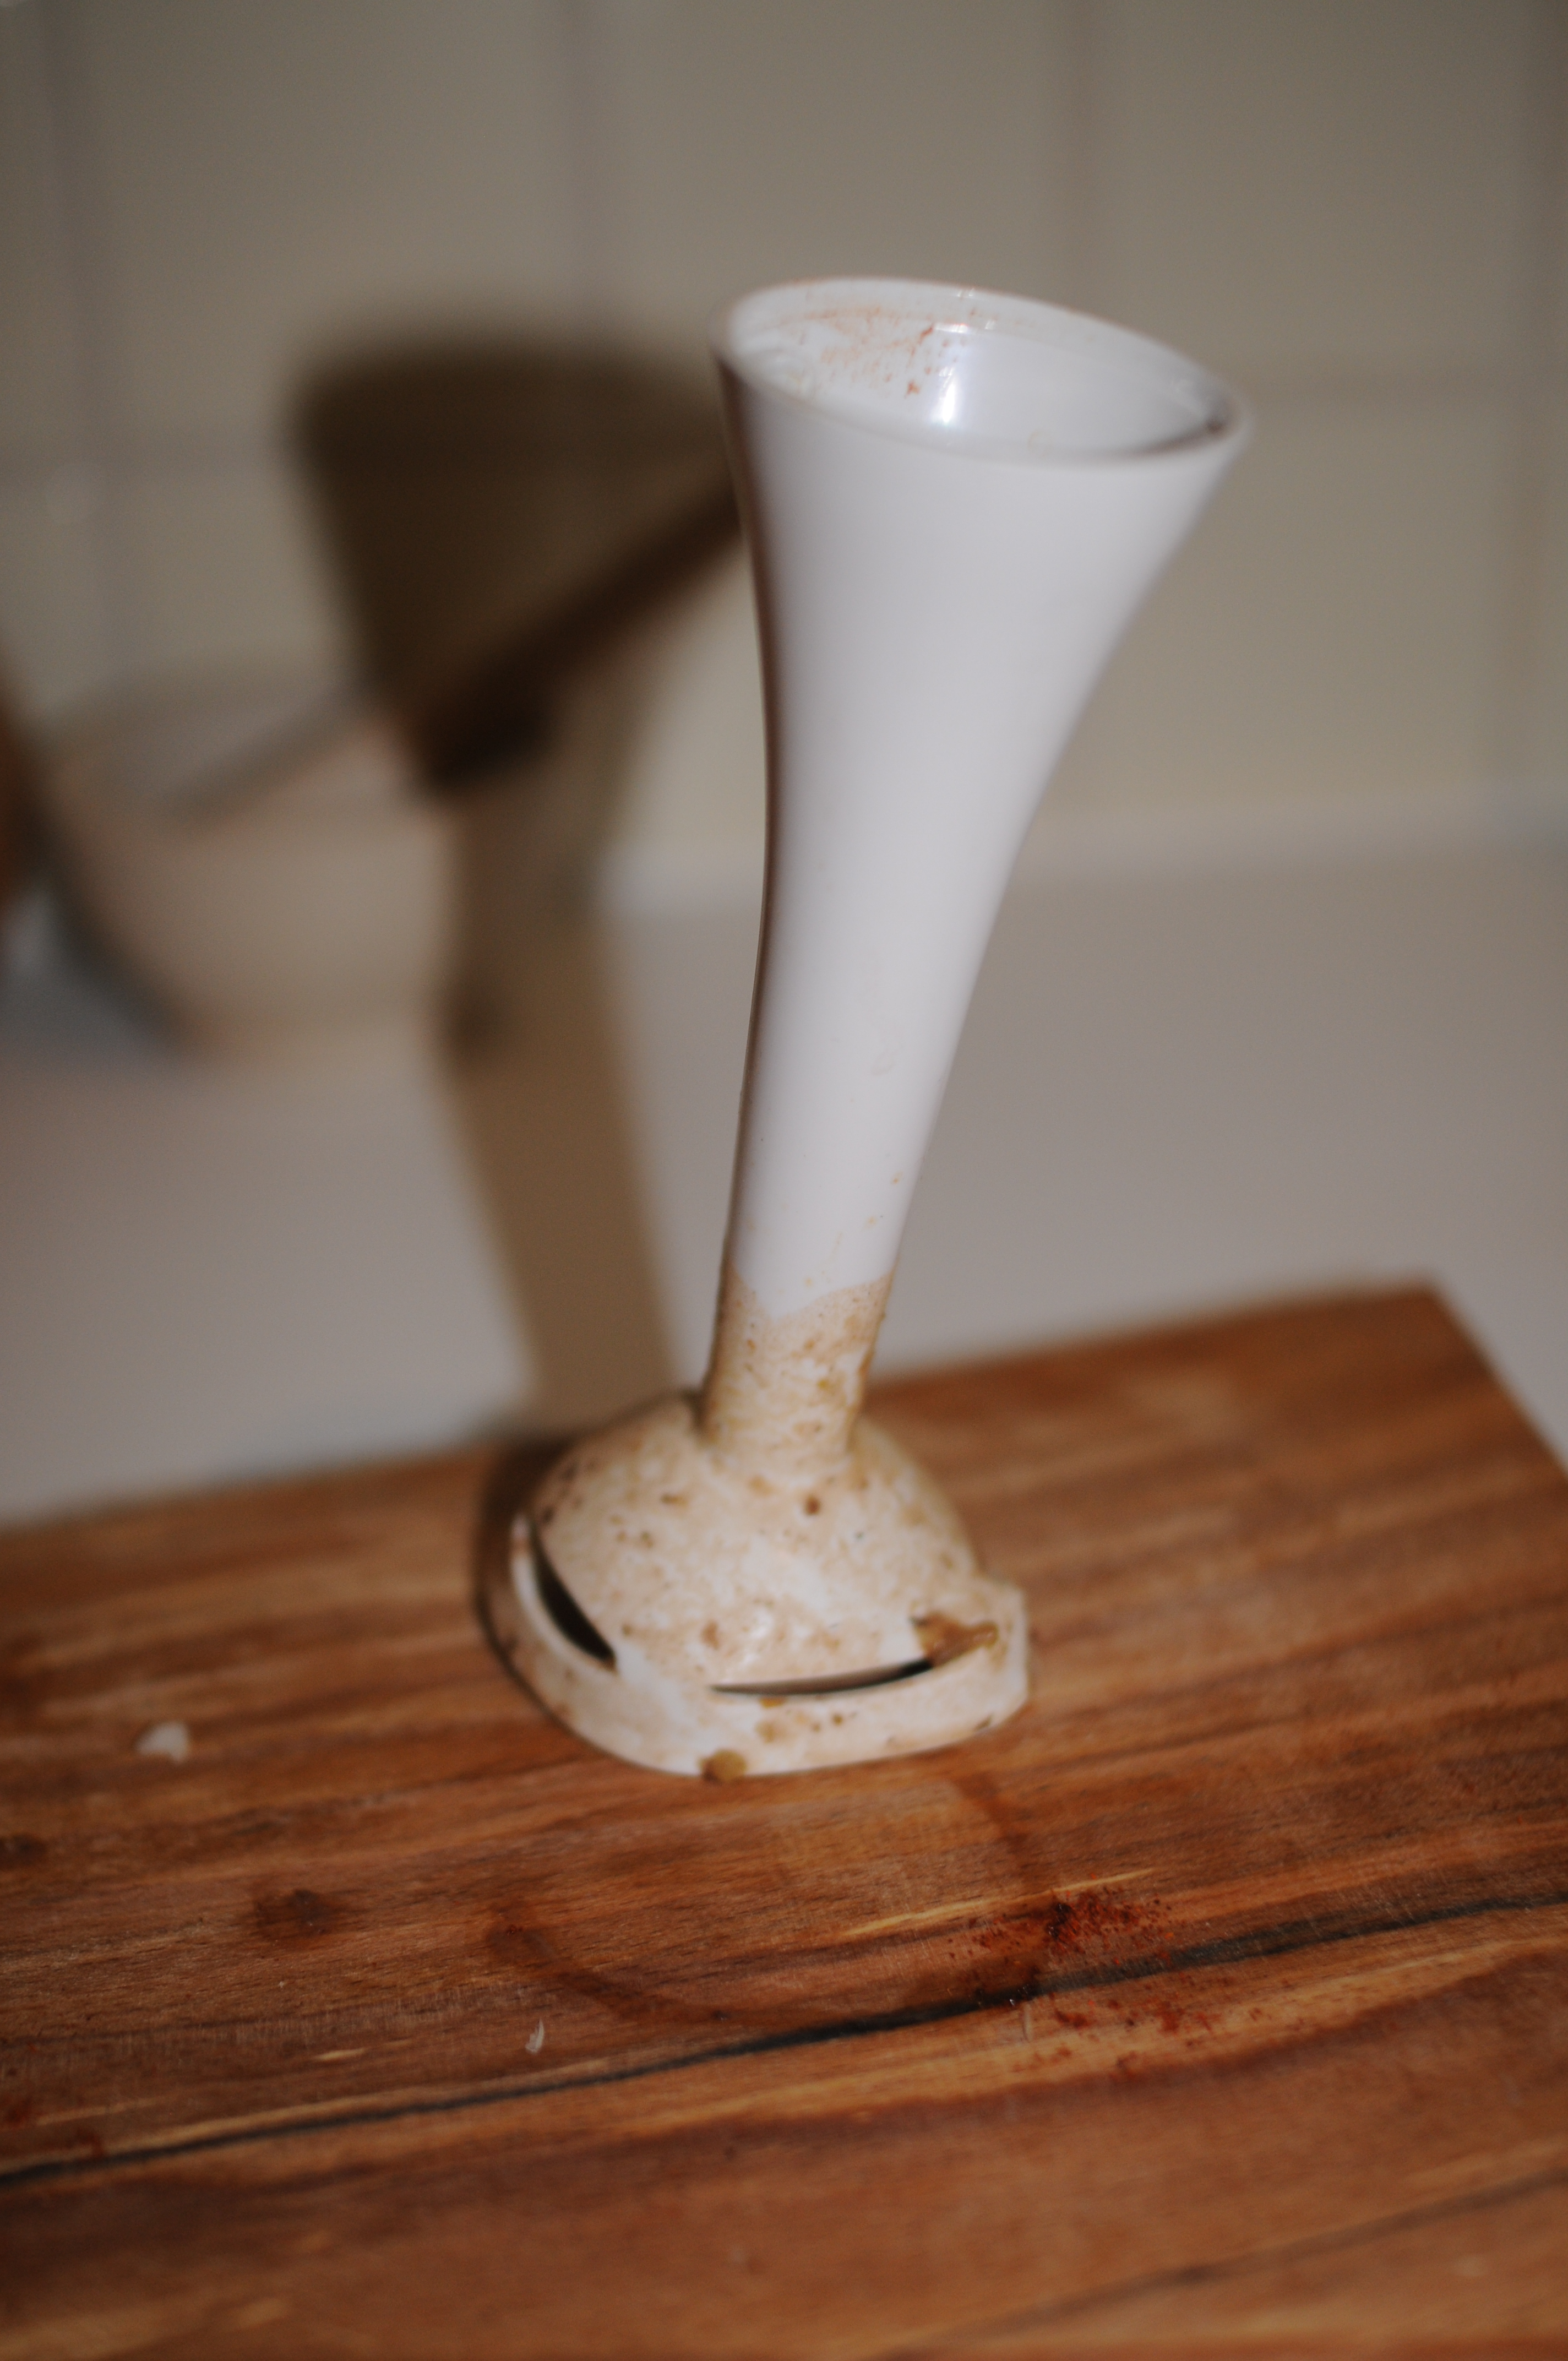
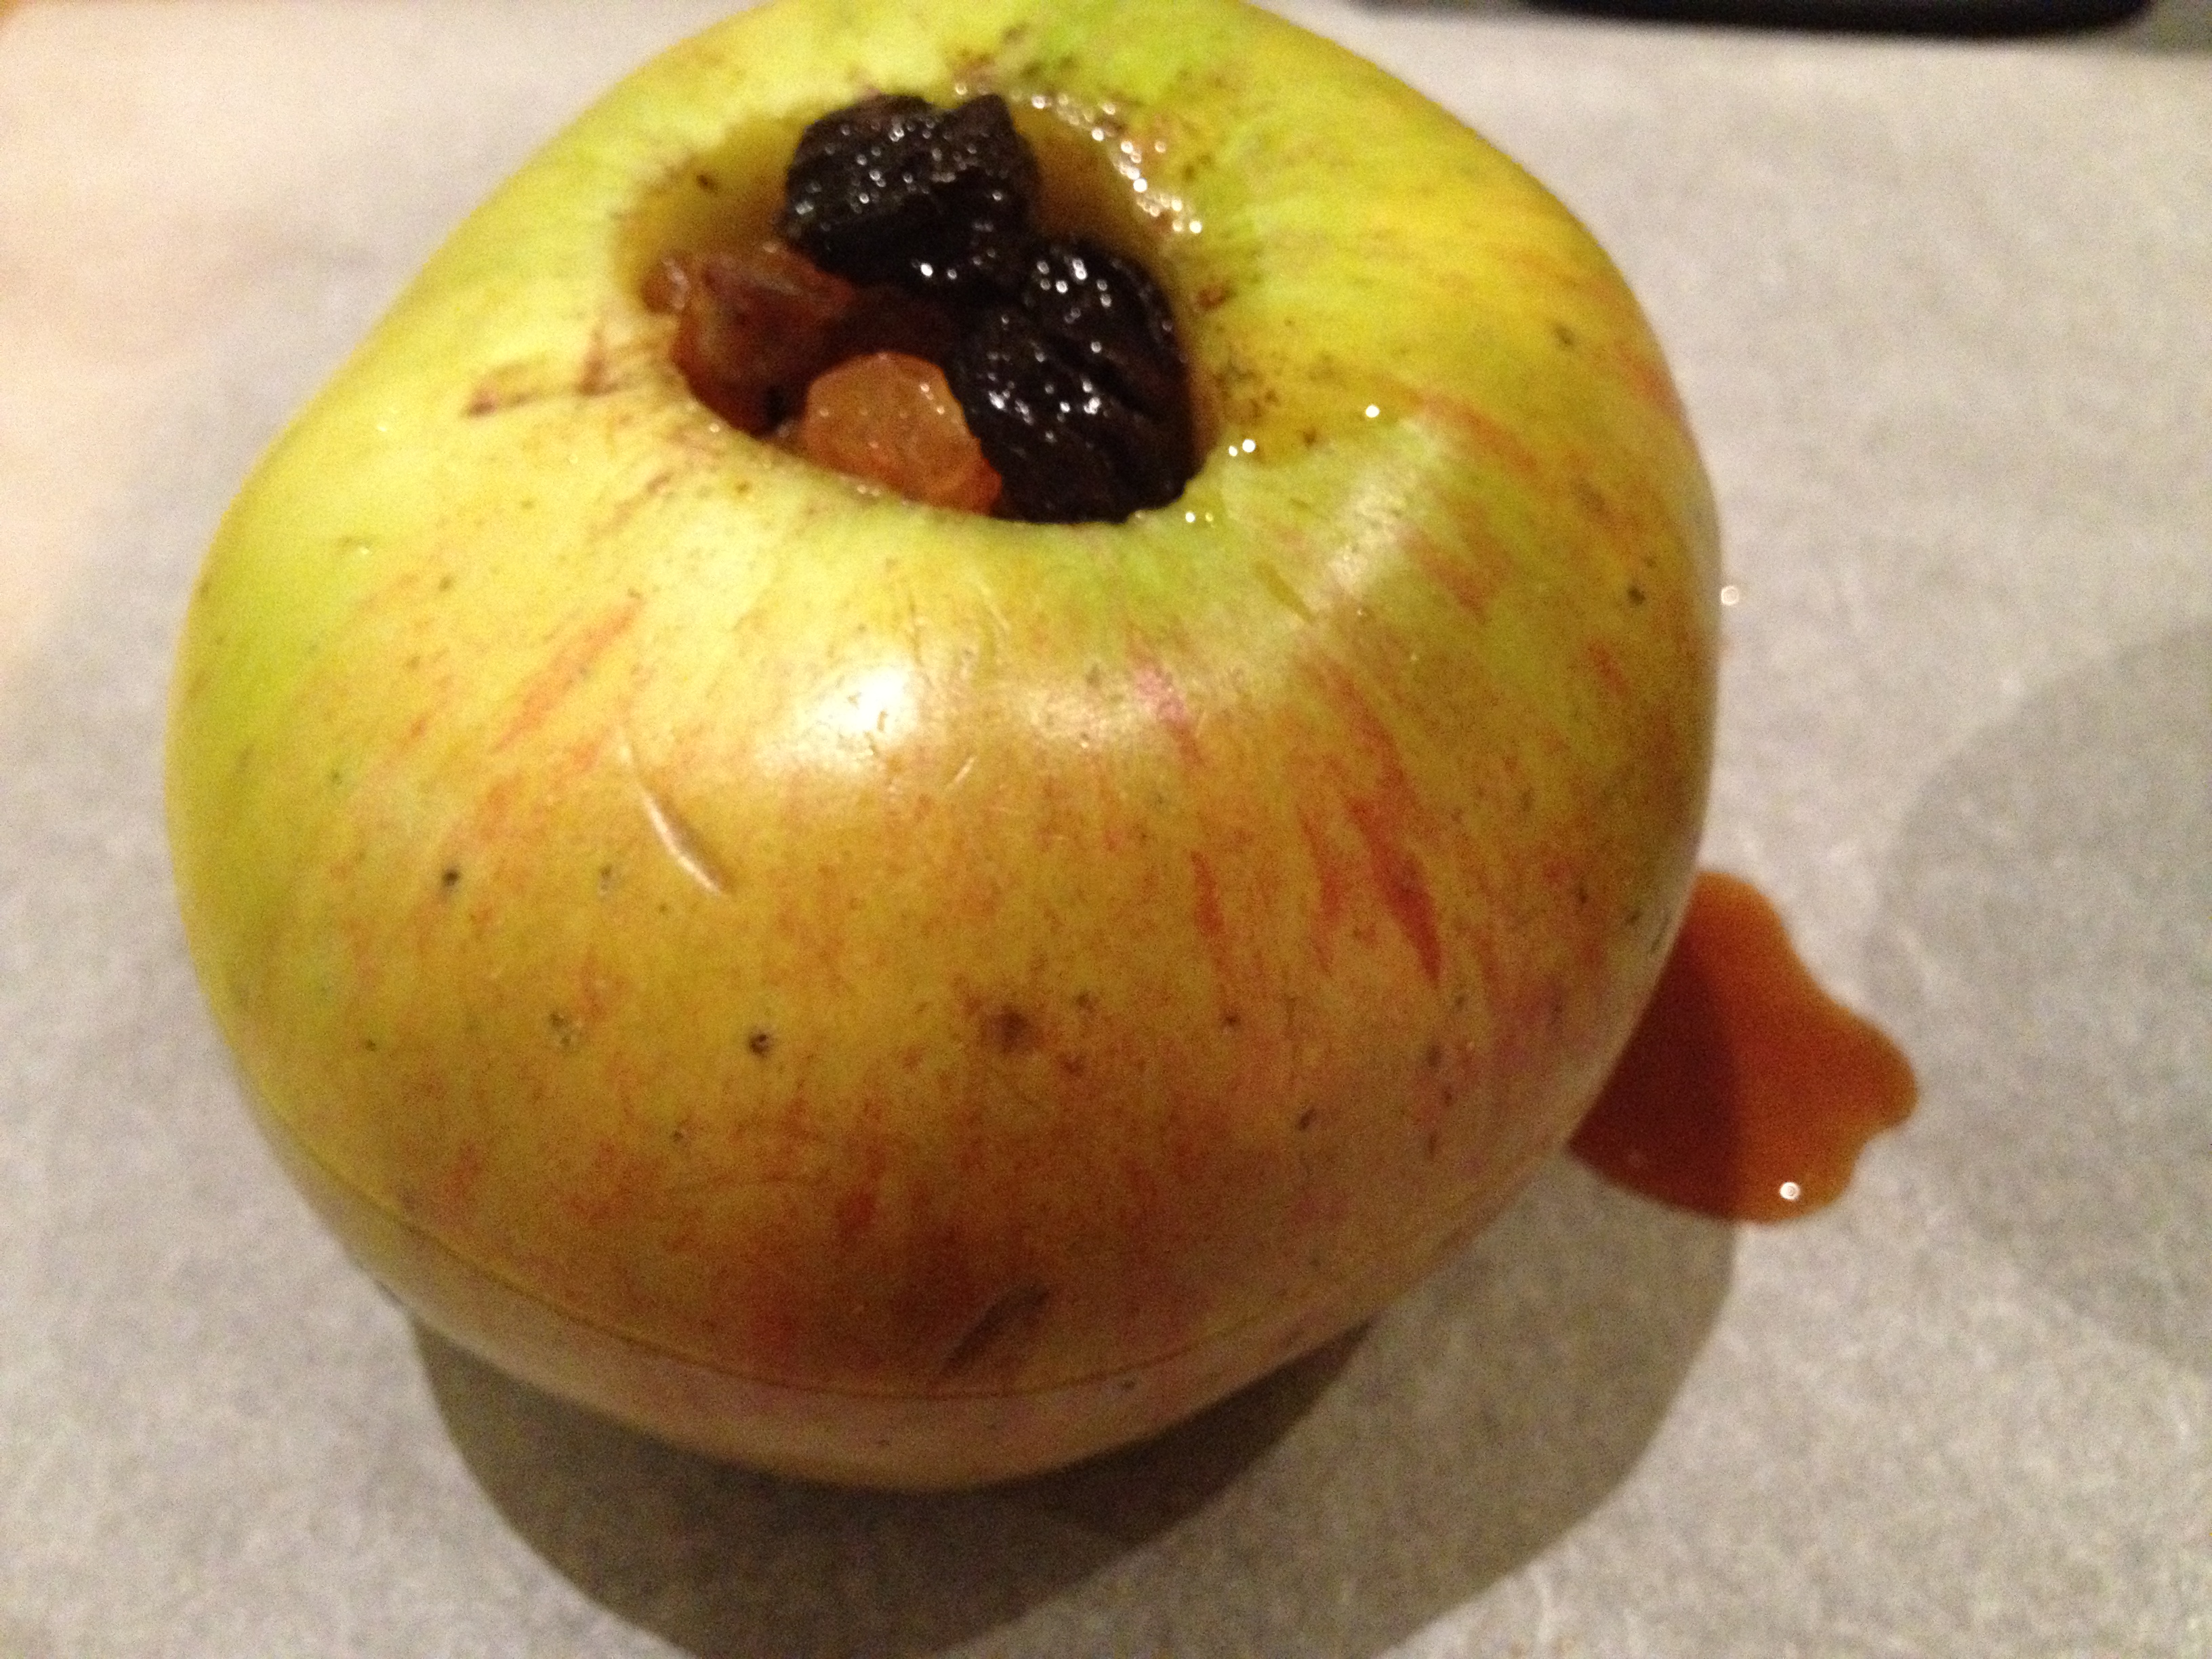
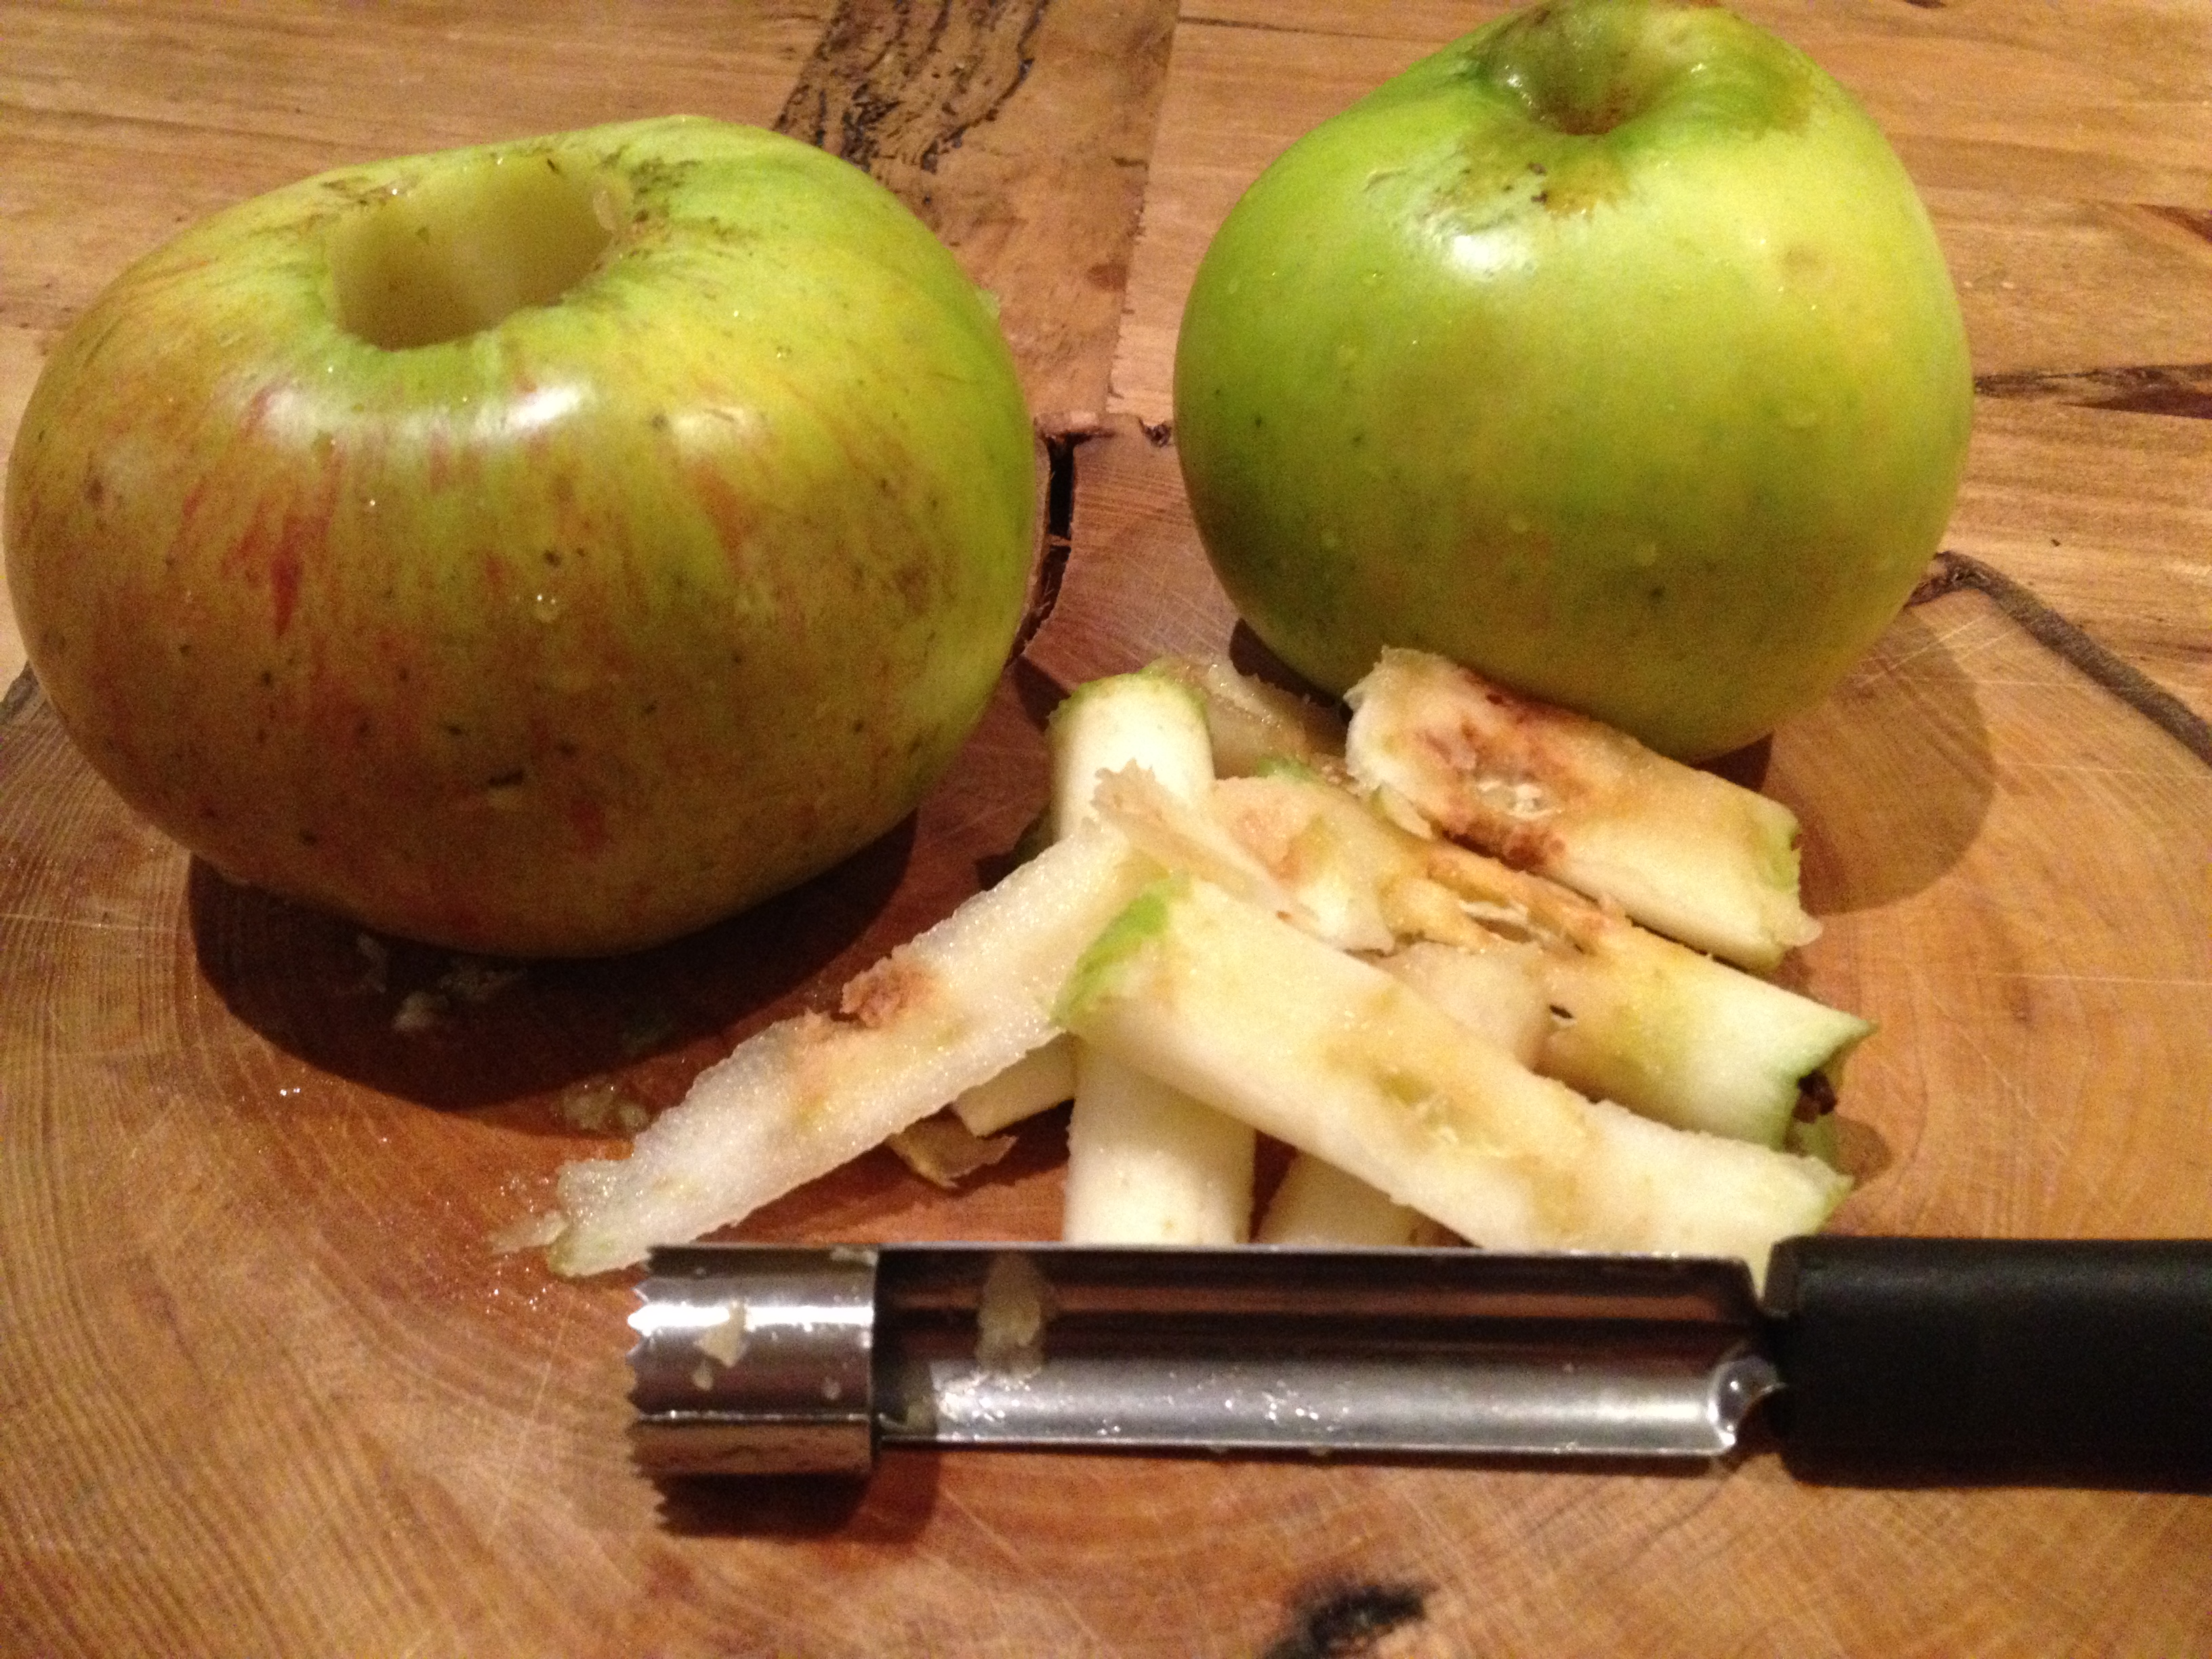
Pre-heat the oven to 170C, then core the apples but leave the skins on as they’re what hold the apples together whilst they cook. You may have to core the apples more than once as they’re so big, you probably won’t get it all in one go. Don’t worry if you think you’ve taken a bit much out, it just means you have a bigger space to fill with the raisin mix.

If you want to stop the apples from bursting out of their skins then score a line horizontally around the middle of the apple. If you forget, don’t worry, they’ll still be delicious and i have to admit to actually quite liking them when they’re a little wonky looking.

Place the apples onto a baking tray lined with baking paper, this is really just to stop them sticking.

In a bowl, toss together the raisins, cinnamon, brown sugar and just enough rum to plump your raisins up a bit (or more if you want it!) and mix it all together so everything’s covered.

Now all that’s left to do is fill the apples with the raisin filling, pack in as much as you can as this is where all the flavour is. Make sure you do this once the apples are already on the tray or they’ll be a pain to transfer over.

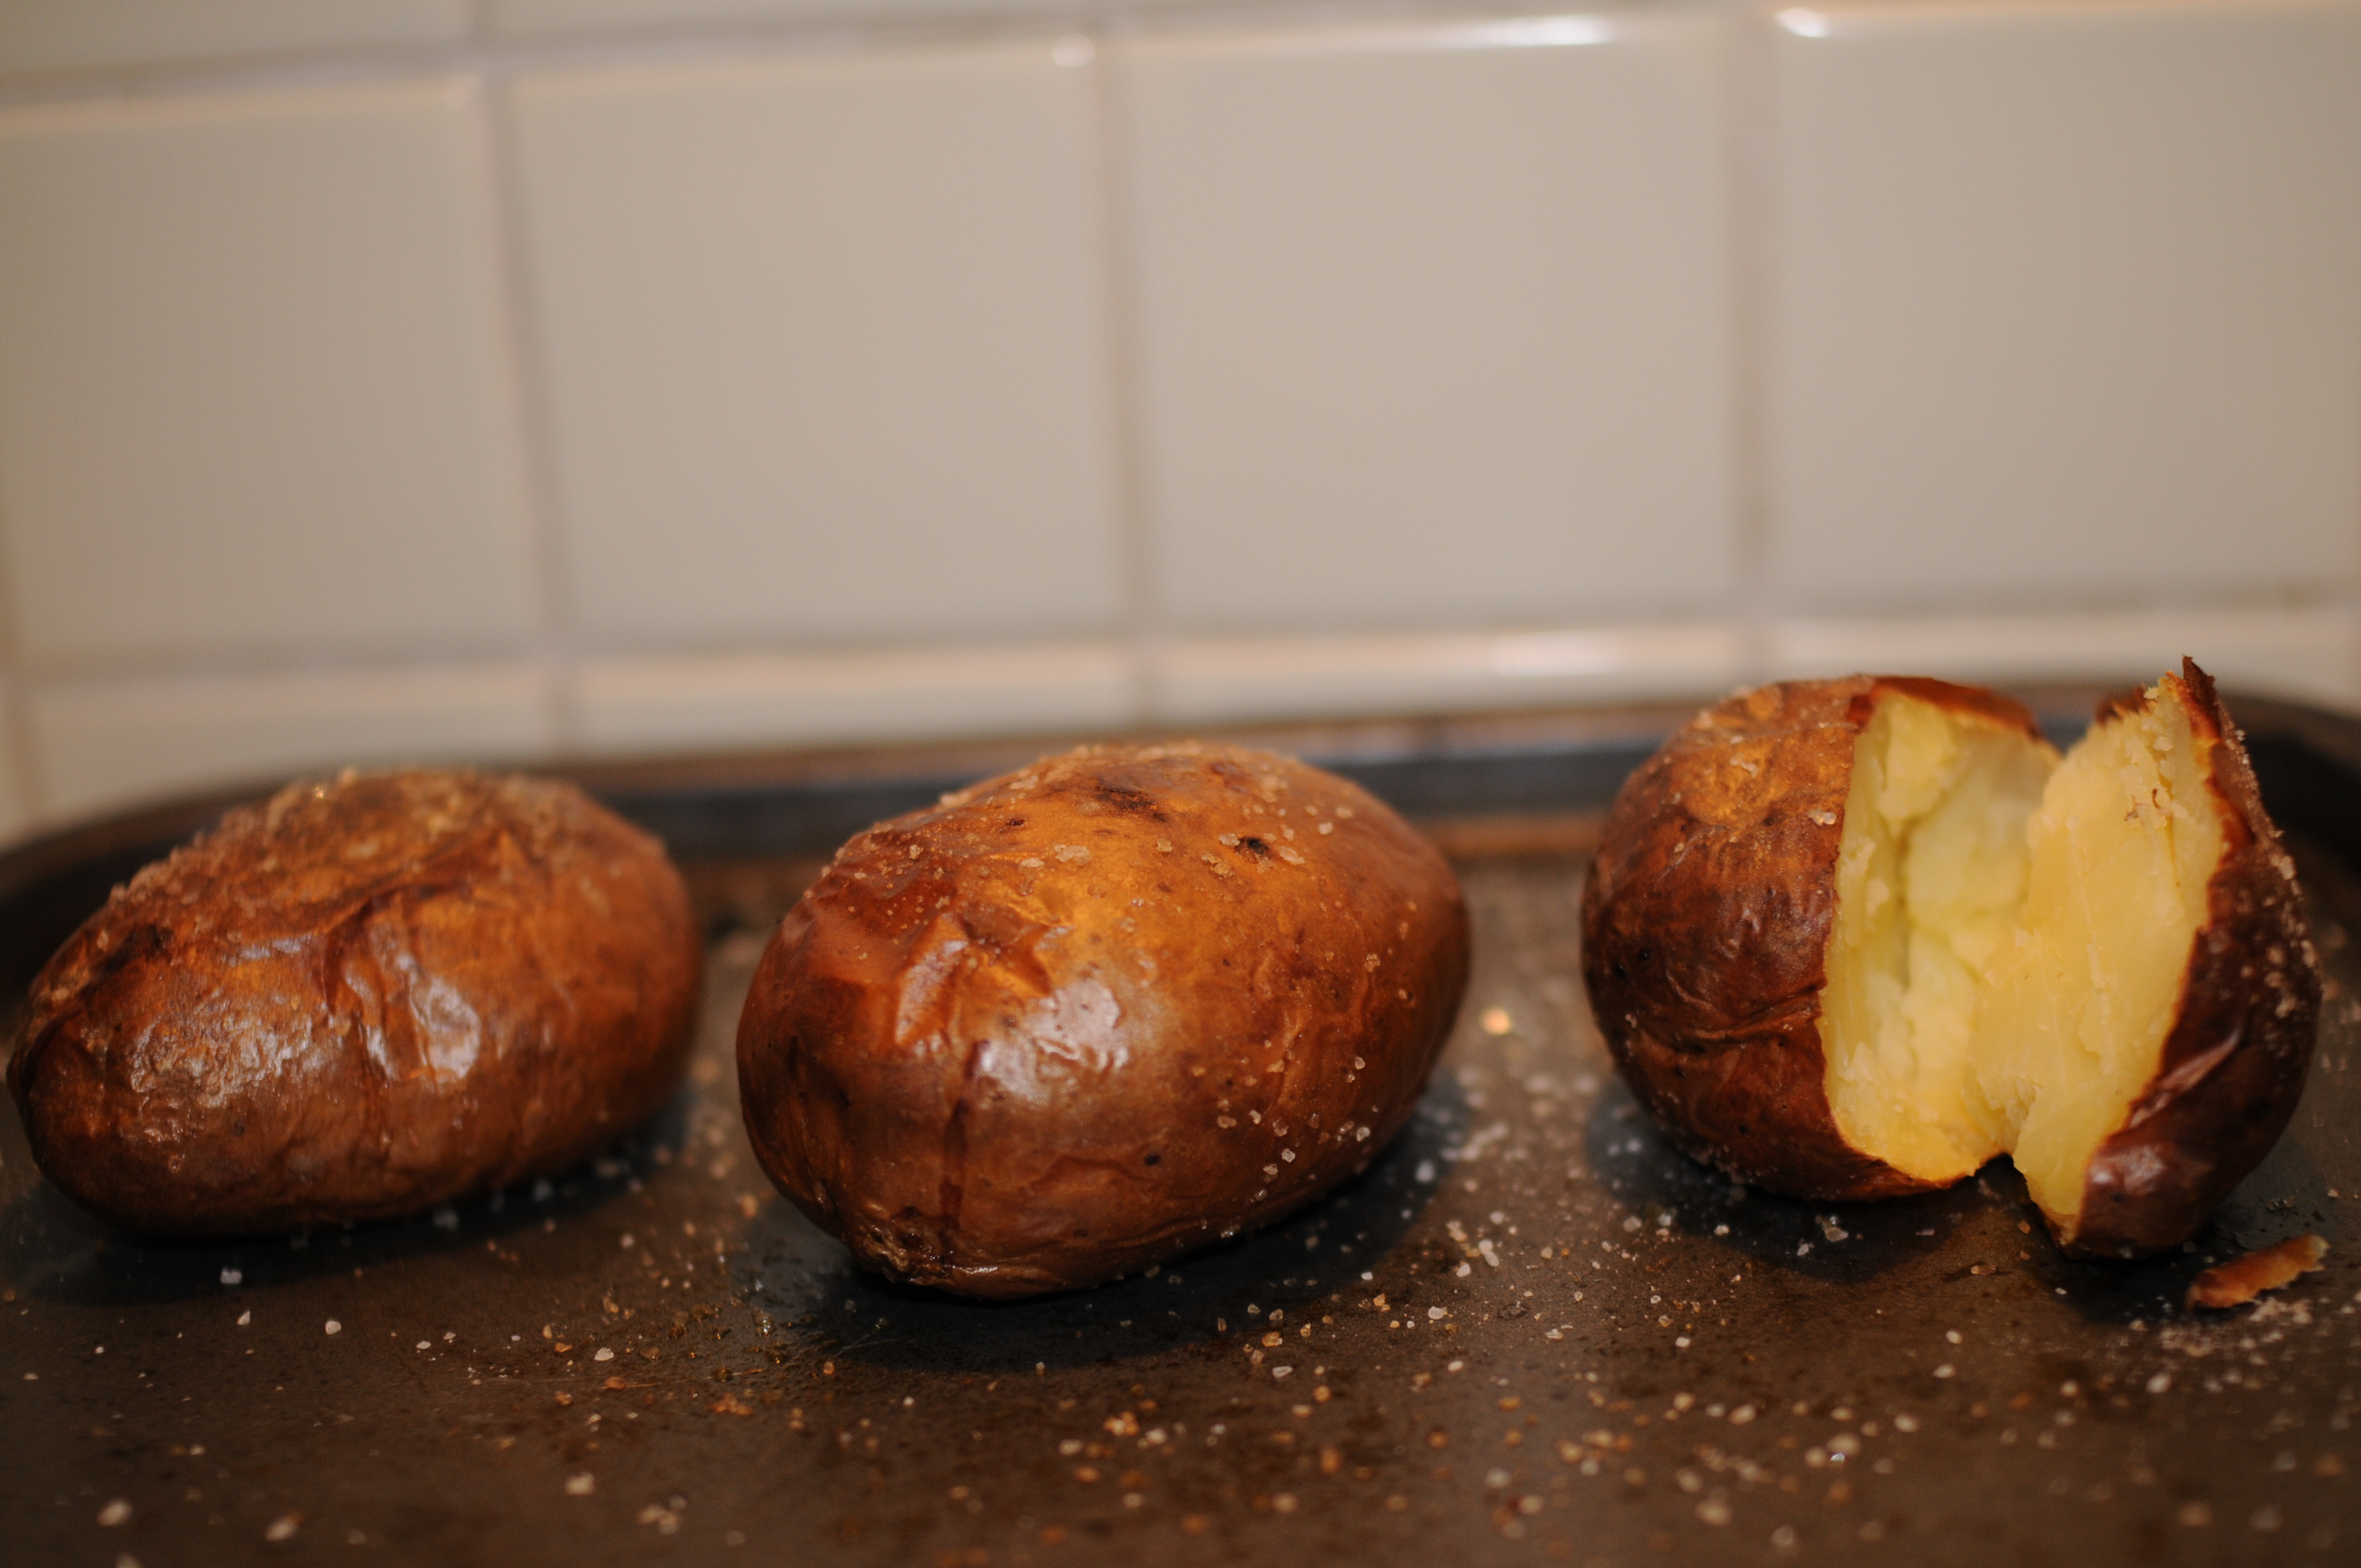
Pop the apples into your preheated oven for about 20 minutes until the skins are shrinking and the apples are bubbling, you want them soft enough that you can eat them with a spoon.

Using a fish slice, or something similar, transfer your apples to a plate, taking as much of the sticky sauce with you as you can.

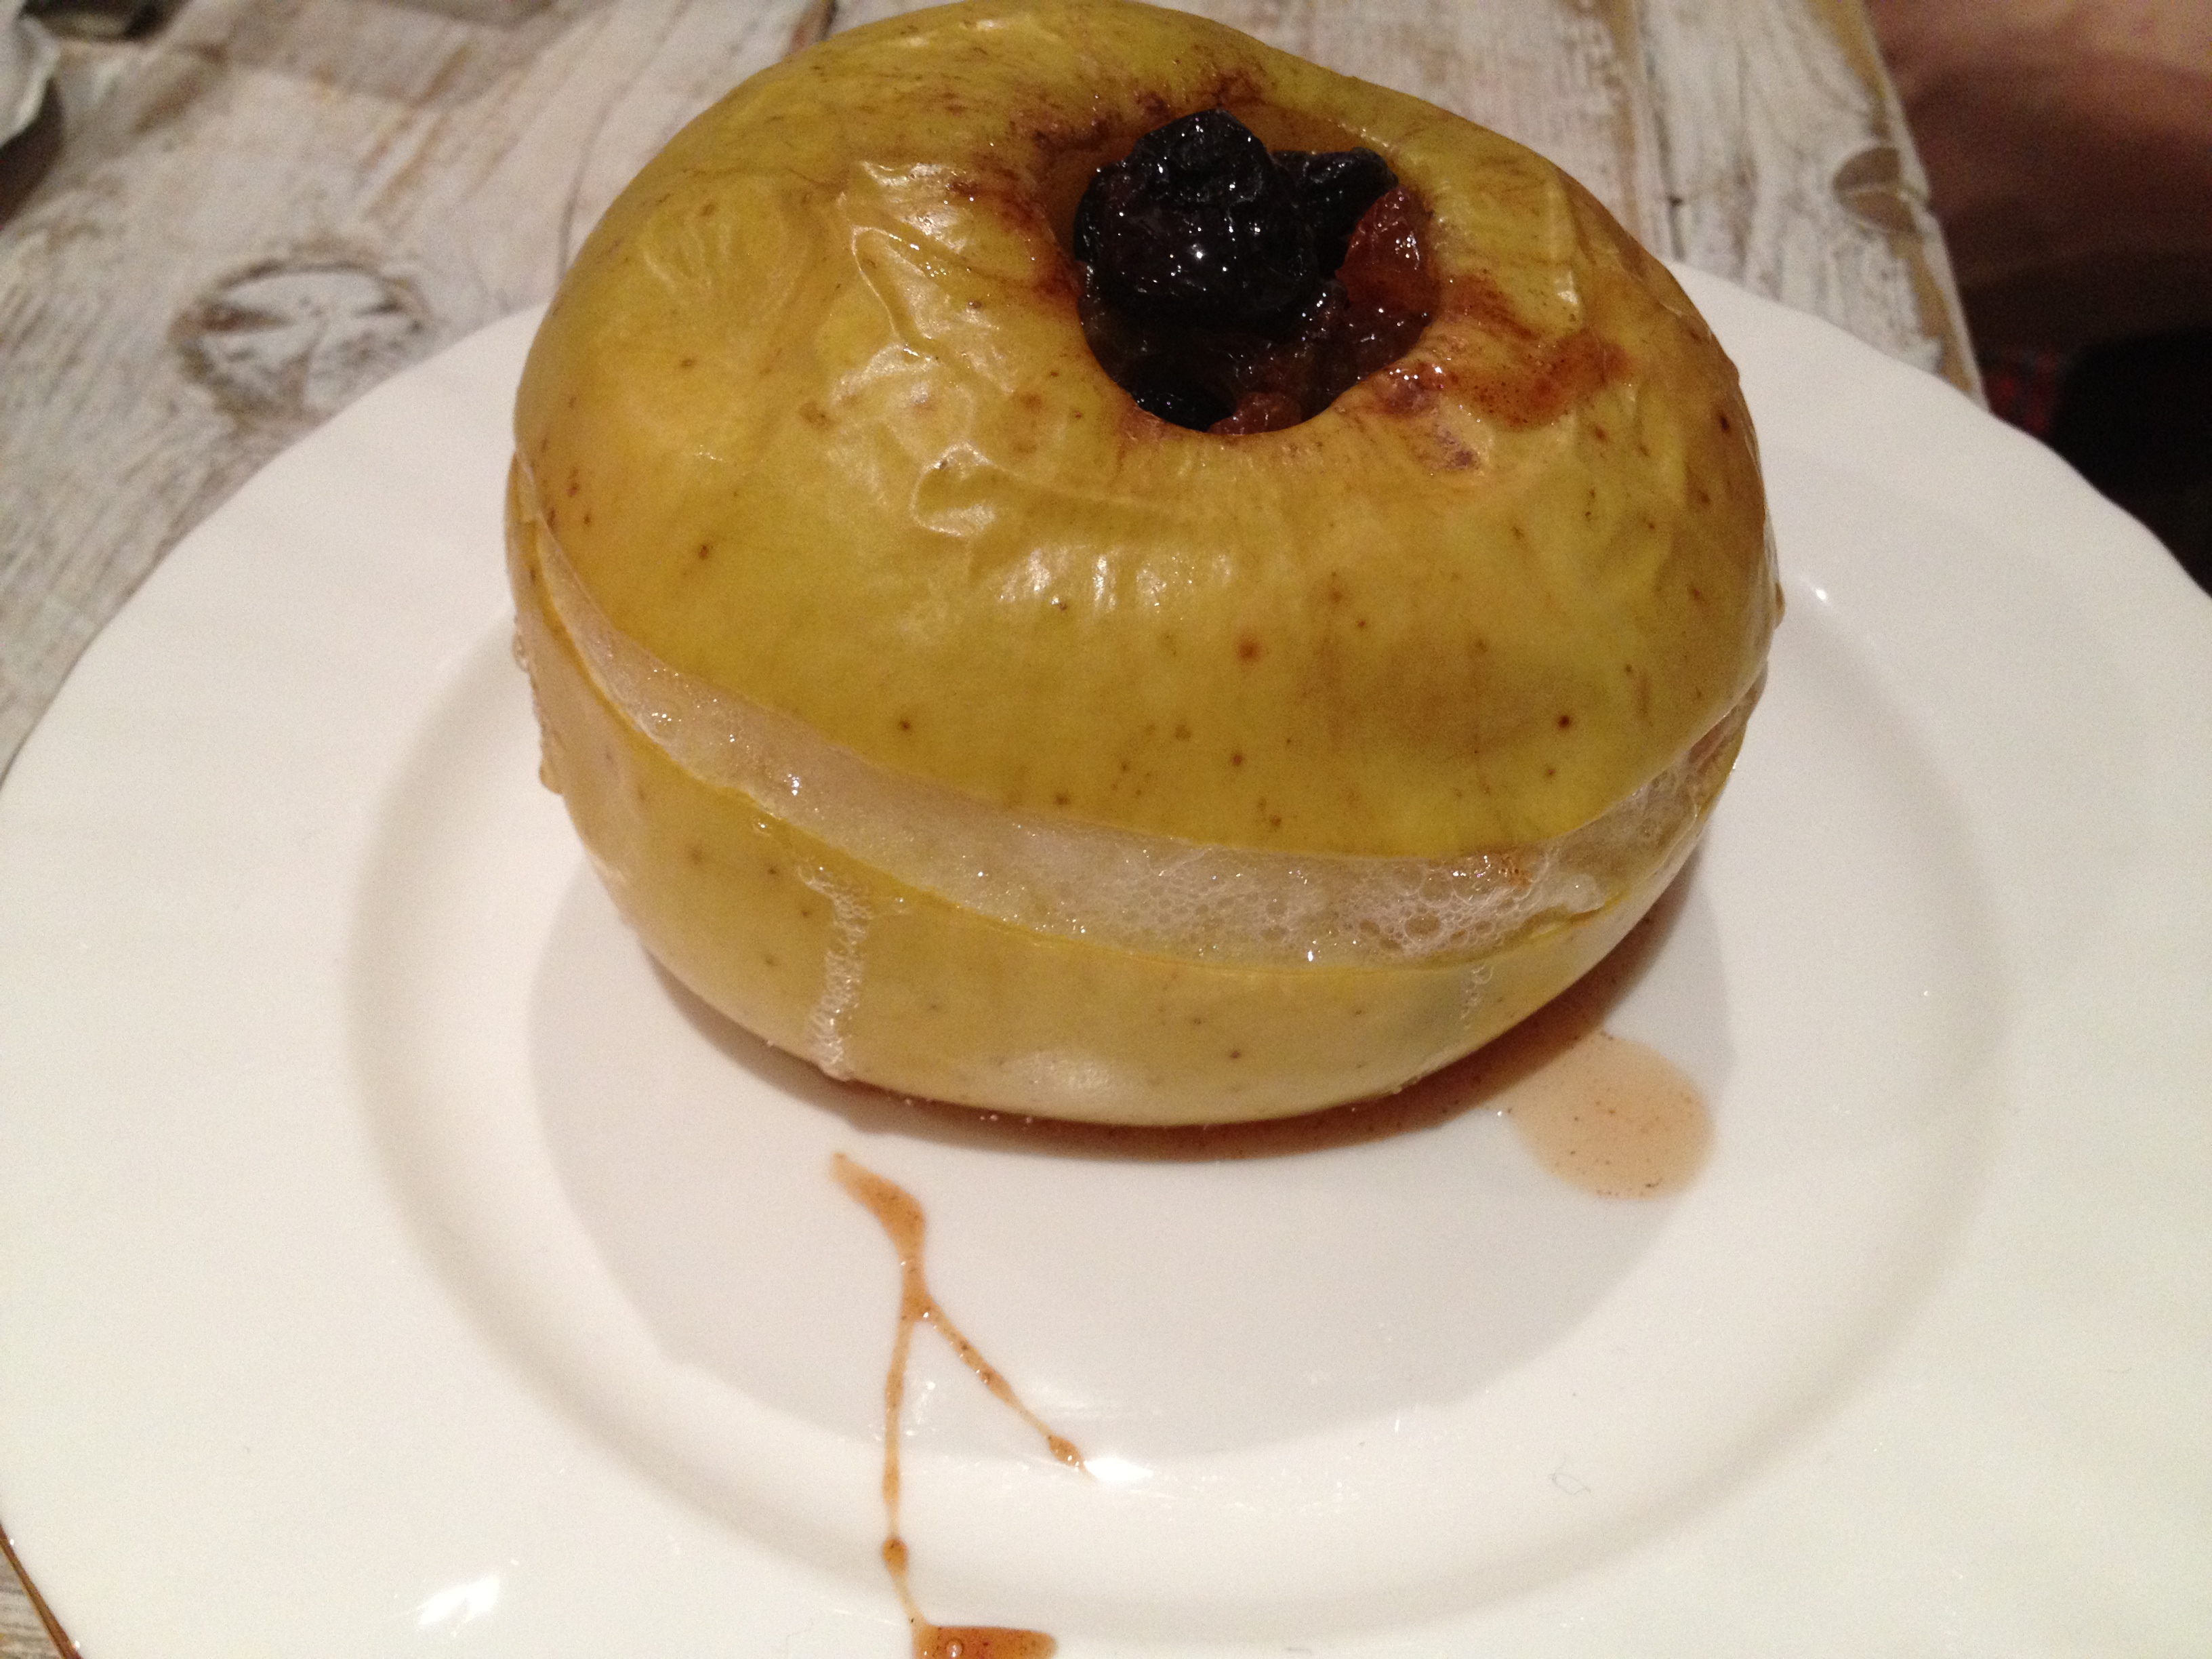
Top with greek yoghurt and a drizzle of honey if you fancy it, and eat while it’s still warm.

Courgette, Cavalo Nero and Butter Bean Soup

Am I the only one who’s oddly glad that autumn is here? After a truly bizarre summer of chopping and changing weather it’s been impossible to know what to wear, let alone cook. You’d walk towards the tube in a summer dress, basking in the suns warmth, only to get off the other end to be greeted by freezing grey skies and rain. It was like travelling through a portal into another world, and it was bloody frustrating. Autumn on the other hand, seems to be behaving itself. The bright crisp days are beautiful and i’m quite happy to don my jacket and my scarf knowing that i’ll be needing it all day, not just for half an hour here and there. Another thing that I will never complain about is autumn food as to me that means soups. As the cooler weather rolls in salads are just not quite cutting the mustard any more and soup is more than happy to take it’s place as the quick and healthy thing you end up having for more meals than you’d care to admit. This is where this little number comes in. I won’t lie, this soup mainly came into existence as i rummaged throught the slightly barren fridge and found not much more than some Cavalo Nero (tuscan black cabbage) and a couple of courgettes. Handily there were some butter beans and onions in the cupboard to tie everything together and hey presto, lunch was sorted. Luckily for me, the end result was just what i was after, warm, comforting and quick. Perfect for curling up with in the evening (or any other time of day for that matter). Another bonus? It’s cheap to make and packed full of iron and protein, sounds pretty good to me.

Courgette, Cavalo Nero and Butter Bean Soup

  • 1 finely diced red onion
  • 2 decent sized garlic cloves, finely sliced
  • 1 tsp chill flakes (optional)
  • 2 medium courgettes
  • 2 tins of butter beans
  • 1 bunch of cavalo nero, hard middle vein removed from each leaf
  • 1 litre of chicken (or vegetable) stock
  • 1 tsp dried oregano or thyme
  • Olive oil and Parmesan to finish

Gently fry the onion and garlic over a low heat until soft but not coloured. Cut the courgettes in half and slice finely into half moons and add to the pan. Drain and rinse the butter beans and add to the pan. Add the chilli flakes and give everything a good stir.

Add your stock and oregano/thyme and simmer for a couple of minutes until everything’s soft whilst you chop your cavalo nero into inch long sections.

Add your cavalo nero and simmer until it’s just soft.

Now is the time you need to taste and season the soup, you will need a fair amount of salt and pepper as the beans and courgettes really need it. You can either leave it chunky like this or you can blend it, i blended about 3/4 of it, just leaving a few little chunks. If you do blend it, wait for it to cool a little before you do so. Then ladle into bowls and finish with a drizzle of extra virgin olive oil and a grating of parmesan.


Bagels with salt beef and wild rocket

I’m just a little bit in love with jewish food. I mean, what’s not to love? Chicken soup, bagels, pastrami, latkes, pickles, salt beef- it’s the ultimate comfort food. I must say though that it’s the salt beef and pastrami that really has my heart.  Now i’m not saying that i wouldn’t miss pork, life without pancetta or a herby sausage would be pretty unthinkable for me. However, not being able to eat pork led to a need for cured beef products and the birth of these wonderous things and for that i will be eternally grateful.

It’s also something that’s pretty hard to get hold of in the Bahamas and as a result it’s something i always crave upon my return. Usually this means a trip to my favourite Brass Rail in Selfridges for a well deserved pastrami sandwich (or if i’m really hungry then a classic Rueben- they’re GIANT). I decided to change all this yesterday though, it seems silly that something so easy to make is something i always neglect at home. it also helps that these can be assembled in no more time than it takes to toast the bagel meaning that these are a great lunch when you don’t have the time to be too leisurely about things (or when you’re just too hungry to wait).

Bagels with salt beef and wild rocket – serves 2

  • 2 bagels
  • 2 handfuls of wild rocket
  • 8 cherry tomatoes
  • 3 tbsp cream cheese (i went for light Philadelphia)
  • 1 tsp dijon mustard
  • 1 tsp grainy mustard
  • 3-4 slices salt beef

Cut each bagel in half and pop them in the toaster, use whichever type of bagel you prefer, i went for multigrain and the boy went for onion. Mix together the cream cheese both types of mustard and some black pepper, you don’t need any salt as the beef is salty enough. Finely slice the cherry tomatoes and wash the rocket. Once the bagels are toasted, smear the cream cheese thickly over half of each bagel and top with the sliced cherry tomato.

Then add 1.5-2 slices of salt beef and top with the rocket. Put the top of the bagel on and cut in half. Obviously you don’t have to do this but i would imagine it would be quite a challenge to eat whole!

Easter baking part 2: Hot Cross Buns

So we’ve had the super speedy recipe, now time for something that involves a little more effort, something for those of you whose ideal morning is one spent baking. Or if it’s not but you feel like putting in a bit more effort than you usually have time for. Or if you just think, damn they look good, I’m going to give those little buggers a whirl. All i would say is, do it. These are SO much better than anything you’ll buy in the supermarket and once toasted, with a lick of butter, they are positively dreamy.

Now for the bit that some of you might hate me for, you will need a stand mixer to make these. The dough is similar to a brioche and as a result is quite wet and takes a LOT of kneading, in short, without the help of a stand mixer, it would take forever and you’d be cursing me all day long for making you embark on such a task. With a mixer however, it’s pretty simple and doesn’t involve much more than plonking a load of ingredients into the bowl, flicking the switch and letting it get on with it. They’ll also freeze really well so you’ll have a delicious tea time treat at just a moments notice.

Hot Cross Buns:

  • for the dough:
  • 250g plain flour
  • 5g dried yeast
  • 60g unsalted butter, melted
  • 30g caster sugar
  • 120ml whole milk
  • 1 egg
  • pinch of salt
  • 50g mixed fruit
  • for the spice syrup:
  • 125ml water
  • 100g caster sugar
  • vanilla extract/paste/pod
  • about an inch of cinnamon stick
  • 2 cloves
  • for the crossing mixture:
  • 100g flour
  • 100g water

Sift the flour, sugar and salt into the bowl of a stand mixer then add the milk, egg, melted butter and yeast.

Using the dough hook attachment, put the mixer on full speed and just let it keep kneading the dough until it no longer sticks to the sides of the bowl and has formed a ball around the hook. It will still stick to the bottom though and it’s quite a silky dough given all of the milk and butter so don’t think you’ve done something wrong. It should look like this:

Form the dough into a smooth ball and place in a bowl, covered, to rise at room temperature for 20 minutes.

Next, pat the dough out into a rough rectangle (do not worry if yours, like mine, doesn’t turn out to be that rectangular…) and scatter over the mixed fruit.

Now you need to knead the mixed fruit in so that it’s evenly distributed throughout the dough.

I find that the easiest way of dividing the dough up is to weigh it out, i tend to make each bun about 40g-50g but obviously you can make them bigger or smaller depending on your preference, you just want them similar sizes so that they bake in the same time.

Roll each piece of dough into a ball, keeping them covered with cling film as you do the rest.

Allow the buns to rise for about an hour. Whilst they are rising, make the crossing mixture, simply combine the flour and water and stir to get rid of any lumps. Put the mixture into a piping bag and put aside until needed. If you don’t have a piping bag, cut the corner of a plastic sandwich bag and use that instead. Once the dough is ready, put onto a baking tray and pipe the crosses over the top.

Place in a preheated 180C oven until golden brown. Whilst they’re cooking, make the spice syrup.

In a pan place the water, sugar and spices. Bring to the boil, then switch off and allow the flavours to infuse until you like the taste, you shouldn’t need the spices in there for that long.

Once the hot cross buns are cooked, brush them generously with the spice syrup, making sure they’re well covered.

They will keep for a few days in an airtight container (if they last that long) or up to a month in the freezer.

Easter baking part one: Chocolate nests

Originally I was planning on being a sensible, organised person and writing this up a few days ago but things tend to get in the way of my plans more often than not, so i thought tonight was better late than never. And at least we still have one more day of Easter to go, right? There are two things I make every year, chocolate nests and hot cross buns (because how can you possibly have Easter without hot cross buns? Seriously, that’s just ridiculous). Also, I don’t know about you but my easter eating tends to go on much longer than this one single weekend. I was dilly dallying about which recipe to share but in the end I decided I wanted to share both as one is quick and easy and the other a little more time-consuming meaning that no matter how long you have to spend in the kitchen, be it a few minutes or a few hours, there’s something for everyone.

First up is  the chocolate nests, not only are they really easy but they’re so cute and fun to make, perfect for doing with kids as well as, apart from melting the chocolate, there’s no heat or knives involved an it takes minimal effort. (I also like to think that seeing as how it has loads of all bran in it, it’s a little healthier…)

Chocolate Easter Nests (makes 8-10):

  • 200g dark chocolate (or white, or milk, just use your favourite)
  • 20g butter
  • 130g all bran (make sure to get the little sticks and not the flakes)
  • mini eggs

Melt your chocolate over a bain-marie (a bowl placed over a pan of simmering water).

Once it’s melted, turn off the heat and add the butter.

Stir the All Bran through the melted chocolate

Line a baking tray with baking paper and dollop spoonfuls of the mixture a few inches apart before pressing the sides up so that they look like little birds nests

Pop in the fridge until they’ve set and then fill with mini eggs

How easy was that? Enjoy, Happy Easter everyone xx


crispy potato skins with sour cream and chive dip, or guacamole, or whatever you darn well fancy

I love potato skins, i know they’re tacky and awful and the kind of food that we associate with TGI Fridays and other such American chains but i don’t care. I also know that i probably should have grown out of such things long ago but this love seems to be an enduring one so I’ve decided i might as well just embrace it. I think part of the reason they’re so maligned is that, more often than not, they come out soggy and so greasy that you could fry and egg on what’s left on your plate. This is what i set out to change. If you think about it, they should be healthy, they’re the skin of a potato, and wasn’t that what your mum always told you to eat because it had all the goodness in it? What makes them so unhealthy usually is the fact that they’re deep-fried which is just totally unnecessary, all they need is a mere lick of oil and a very hot oven and they come out deliciously crispy and salty and (dangerously) moreish. They’re also remarkably hassle free, simply bake them as you would a normal jacked potato, then scoop out the middle, cut into wedges and pop back in the oven and hey presto; perfect, healthy potato skins. They might take a while in the oven but the hands on time is minimal. Also, by making these yourself it means that you really stretch these potatoes, save the middle and you have instant mash.

The toppings are endless for these: sour cream and chive, garlic mayo, sweet chilli, guacamole, baba ganoush, cheese-bacon-spring onion. You could dip them in chilli con carne, soups, stews. Make them with sweet potatoes instead, whatever you like.

Crispy potato skins-serves 2

  • 3 large baking potatoes
  • olive oil
  • salt

I told you that was all there was to it. Now, pre-heat your oven as high as it will go, coat the potatoes in a little oil and sprinkle with salt. You only need a little oil and if you’re concerned about salt intake then you can leave it off entirely. Personally I’m hoping it’s not something i have to worry about too much yet so on it went. Pop them on a baking tray and cook until the outside is crispy. If the skins are crisp but the middles aren’t quite cooked, turn the heat down to about 170C until they’re cooked through.

Remove from the oven and put the temperature back up to full whack, cut them in half and scoop out the flesh, leaving a cm or 2.

Drizzle the insides with a little more oil- if you have an oil spray, even better. Put back in the oven until the insides have dried out and everything has crisped up.

Now you’re ready to dip to your heart’s content. I went for sour cream and chive as it was in the fridge and just heaped on some more fresh chives for extra flavour.

Creamy pasta with chilli, lemon and garlic

I don’t know about you but when I’m a bit ill and feeling a bit sorry for myself, what i want is comfort food. A bowl of something that’s going to pep me up and make my taste buds do a little jig as everything has a tendency to taste bland and boring. It also needs to be quick. This dish is perfect for such a mood. It’s also great if you’re tired/rushed for time/feeling a bit lazy or just want something light and fresh that feels so right with this gorgeous weather we’re having.

I’m getting my garden furniture this week and i can’t wait to start having dinners outside. I think I’m just a little paranoid that this may be our summer (which is what happened last year) so I’m going to cram in as many long, lazy, alfresco dinners (and lunches, breakfasts, afternoon teas and brunches) as possible before it goes away. The time that we allocate to cooking in the warmer months is always significantly less than in the winter months. You want to be having cocktails in the garden or reading your book in the sun, not slaving over a hot stove. In the winter it’s perfect, it’s cold and rainy so there’s no temptation to leave the house and we quite happily while away the evenings making hearty soups and stews but not now. Now is the time for quick, light, punchy flavours that can be thrown together in the merest of moments.

I’m not really giving a lot of measurements for this dish as it’s something you can play around with, substituting the veg for whatever you have on hand. If you don’t like broccoli or cauliflower, this would also be good with peas/asparagus/spinach. I would try to get the lemon in there if you have it as it really lifts the whole thing, stopping it from being too rich but obviously it’s totally up to you. Also feel free to omit the chilli entirely or use full fat crème fraîche

Creamy lemon, garlic and chilli pasta-for 2

  • An overflowing handful of pasta per person
  • A handful of chopped veg per person (i used broccoli and cauliflower)
  • 1/2-1 fresh red chilli (i used one and it had quite a kick)
  • 1 plump garlic clove
  • zest of half a lemon
  • a nice big dollop of half fat crème fraîche
  • a couple of handfuls of freshly grated parmesan
  • basil to serve

First up, get a big pan of salted water on to boil for your pasta. It’s really important to put quite a bit of salt in your pasta water- there’s an Italian saying that your pasta water should be as salty as the Mediterranean. If you don’t do this, your pasta will be bland and dull and you’ll end up having to put far more salt in your sauce, all of which you’ll eat- most of the salt in the pasta water being poured away after the pasta has taken all that it needs.

Next, chop your veg into bite sized chunks and finely slice your chilli and garlic. Cook your pasta, throwing the veg in for the last couple of minutes. Gently fry the sliced chilli and garlic in a little oil until soft and then chuck in the cooked pasta and veg. Keep a mugful of the pasta water as it’s perfect for loosening your sauce so it’s the perfect consistency. Add your crème fraîche, lemon zest and a grind or 2 of black pepper.

Stir everything together, adding pasta water as needed until the sauce is silky smooth and coating everything. Then turn the heat off and add your parmesan.

Now just plate up and finish with a smattering of fresh basil leaves. Grab a glass of cold white wine and maybe a simple green salad and head for the garden.


Tart aux Pommes (french apple tart)

I got a message the other week from a friend simply saying “I’m coming to London on Wednesday, cancel all your plans”. A dinner was promptly planned at a friends house and (shockingly) i was asked to bring along dessert. My original plan was to make a dark chocolate and salt caramel tart but then i remembered i had made the somewhat impulsive decision to give up chocolate for lent so that idea had to be scrapped. I’m quite glad of this actually as i decided to go for something altogether lighter, an apple tart. I’ve had this recipe knocking around for a couple of years now and it’s been ages since i last made it, although, having tasted it, i’m at a loss as to why, it’s really light and fresh tasting, whilst also feeling quite indulgent. There are still pretty cheap apples to be had everywhere as well which is always handy. It’s also very easy considering how impressive it looks and needs nothing more than a dollop of creme fraiche to go with it. You don’t have to use two different types of apples but it is nice to have to contrast, the bramley apples for the filling have a tartness and texture that you want for the cooked apple and the braeburn being much sweeter and prettier for the top decoration.

This recipe makes 1, 8inch tart which serves 8

Tart aux Pommes (french apple tart)

  • For the pastry:
  • 125g unsalted butter
  • 50g caster sugar
  • 1 egg
  • 200g plain flour
  • pinch salt
  • zest 1/2 lemon
  • splash vanilla extract
  • Apple Compote:
  • 4 Bramley apples, peeled, cored and diced
  • 50g caster sugar
  • vanilla extract
  • zest 1/2 a lemon
  • 50g unsalted butter
  • Decoration:
  • 2 Braeburn apples, peeled, cored and finely sliced
  • 30g melted, unsalted butter
  • 30g caster sugar

For the pastry, beat the butter, sugar, salt and lemon zest together until creamed together.


Then add in the egg and a splash of vanilla extract and combine.

Once everything is mixed, add the flour all in one go and bring together. You don’t want to overwork your pastry or it will go tough so as soon as it comes together in a ball, cling film it and put it in the fridge to rest for half an hour – an hour.

For the apple compote, melt the butter and add the caster sugar. When the sugar has dissolved, add the bramley apples, the lemon zest and the vanilla.

Make sure all the apples are coated in the butter and sugar and cook over a low heat until the apples have broken down, then allow to cool. This is what you want to end up with:

Preheat the oven to 190C. Take the pastry out of the fridge and smoosh together with your hand so that it’s pliable and all the same temperature (the outside gets colder than the middle so the smooshing together will even things out and make it easier to roll). Dust the surface and the pastry with flour and roll the pastry out to about 2-3mm thick and gently ease it into a loose bottomed tart tin, carefully pressing it in.

Stab the pastry base and sides all over with a fork, this will allow steam to escape during cooking, preventing the pastry from shrinking and puffing up on the base. Put back in the fridge for 15 minutes.

Next you need to blind bake the pastry, this involves covering the pastry with some parchment paper and weighting it down (this is also to prevent shrinkage, you won’t end up with a tart case if you skip this step, just a flat disc of tough pastry). You can buy ceramic baking beans for this but the best thing is to use rice/lentils/dried beans, anything you have knocking around your cupboard- these can be used over and over again.

Bake until the sides are turning golden, then remove the baking beans and put back in the oven until light golden all over. You don’t want it to get too much colour.

Once it’s cooked, fill with the cooled apple compote

and top with the sliced braeburn apples. Brush with the melted butter and sprinkle over the caster sugar. Turn the oven up to 230C and put the tart back in the oven until the top is lightly golden-keep an eye on it (do not wonder off to go and do your make up).

And that is why i’m saying keep an eye on it! If that happens, don’t freak out, it happens to the best of us, just scrape it off and carry on, no one even batted an eyelid and it was still yum.

Now all you have to do is serve up with a pot of creme fraiche and let everyone dig in.

Crepes au Citron

Image

I woke up this morning in a bit of a panic “aah, i haven’t done a pancake post and it’s pancake day tomorrow!” Now i’m sure that a lot of you out there are thinking, “er, calm down, it’s just pancake day and also, you’re a bit of a weirdo”. This may be very true, but i’m a serious fan of pancake day, you can have thick ones, thin ones, ricotta ones, buckwheat ones, souffle ones- the list goes on and on. You can make them sweet or savoury and put pretty much anything in them or on them that you can think of and it’ll probably be delicious. Given that i have to run out the door in a couple of hours to a two hour salsa class (i am going to be such a pro in a few weeks, just you wait and see) i don’t have much time to do anything too elaborate. Also i’m guessing that most of you don’t want to spend hours making something anyway, you just want to consume as many pancakes as possible on the one day a year that it’s not seen as weird. With that in mind, i thought i’d share one of my favourite recipes, it’s a French classic and a twist on the good old lemon and sugar. If you wanted to make savoury crepes/pancakes then simply leave out the 10g of sugar in the batter and you’re good to go. Happy pancaking everyone!

Crepes au Citron- makes enough for 4 people

  • 125g plain flour
  • 1 large egg, beaten
  • pinch of salt
  • 10g caster sugar (for sweet ones only)
  • 300ml whole milk
  • 20g butter, melted to nut brown
  • 60-100g caster sugar
  • 2 lemons
  • 50ml water

First of all, get your batter on the go as you need to let it rest for a while. Sift the flour, sugar and salt into a bowl (and actually sift it, no one likes a lumpy crepe).

Make a well in the centre and add the beaten egg.

Start to whisk and then gradually add the milk until you have a smooth batter.

Melt the butter and cook it until its brown an smells nutty-not black and smells burnt.

Add to the batter. Cling film the bowl or pour into tupperware and let it rest in the fridge for 20-30 minutes, this will help ensure a nice smooth batter.

In a saucepan, put the sugar, the juice of one lemon and 50ml of water and bring to the boil. I’ve given quite a variable amount of sugar as it’s completely dependent on how sweet you like things, i love really tart lemony things so i only use 60g but you’ll probably want more so just keep adding sugar and tasting until it’s sweet enough for you.

While the syrup is heating, supreme the other lemon. To do this, you cut off the top and the bottom of the lemon and then cut off the skin around the outside, making sure to remove all the white.

Next, cut between the membrane of each segment so that you end up with all the segments devoid of anything around them.

Once the syrup has come to the boil, take it off the heat and a the lemon segments.

Next up, make your crepes, wipe a little flavourless oil around your pan, i like to do small ones as i think they’re cuter but do whatever size you like. Bring your pan up to a medium heat and add just enough batter to cover the bottom of the pan. Cook one side, then flip. You only want them lightly coloured, don’t let them get too brown.

You want 3 of these little crepes per person. Cook them one by one and then stack them up between baking paper until you need them.

Once you’ve cooked them all, fold each crepe into 4 and warm up the syrup.

Warm them through in the syrup

Now all that’s left to do is serve them up, making sure to get some syrup and a few of the lemon segments.


Spicy Black Bean Soup with Chorizo, Feta and Spring Onion

Tags

,

I got a message the other day. It said “I’d like to make black bean soup, how please?”. And it got me thinking, there are many recipes out there for black bean soup and many restaurants selling it, any yet, I’m not sure I’ve ever found a truly great one. Don’t get me wrong, there have been lots of good ones, but none that really blew my mind, they’ve always been lacking that certain something, that oomph. I also often find most of these kind of soups more like a puree which wasn’t what i was after here, i wanted something a little thinner. I wanted something spiced as well as spicy and deeply flavourful, and by golly, i think i’ve got it. I was thinking about what goes into making a good soup and, for me, more often than not, it’s what you put on it as much as what you put in it. Now, honestly I’m a pretty big fan of this soup on its own but the toppings just make it so much better.

It’s also a goodie for a quick mid-week dinner as it’s super quick, cheap and it’s even healthy to boot, woop, jackpot. It’s also very easy to make it vegetarian, simply swap the chicken stock for veg stock and leave off the chorizo.

I’m a little achey today given that yesterday, after months and months of talking about it, my friend and i finally went and did a salsa dance workshop. Having had a truly hilarious day, when we got back we were exhausted and starving and a hot bowl of this was just the ticket- well, that, a few glasses of prosecco and the bodyguard. I hope you enjoy it as much as we did. I feel that both this soup and the salsa-ing may be cropping up a lot in the near future….

Spicy Black Bean Soup

  • 1 medium onion
  • 1 medium carrot
  • 1 stick of celery
  • 2 big fat garlic cloves
  • 2 cans of black beans, rinsed (or 800g cooked black beans)
  • 1.5 tsp ground cumin
  • 3tsp hot chilli powder
  • 1 tsp ground coriander
  • 750ml chicken stock
Toppings
  • Little cubes of chorizo (if you’re feeling a tad lazy, waitrose do packs of them)
  • Sliced spring onion
  • Crumbled feta cheese

Finely chop the carrot, celery, onion and garlic and rinse the beans.

Pop some oil in a pan (i use rapeseed) and fry off the onions, carrot and celery over a low heat for a few minutes before adding the garlic. Sweat everything down until soft but not coloured.

Add the spices and the beans and stir so that everything is well mixed and coated in the spices.

Then add the chicken stock, i used 2 organic chicken stock cubes dissolved in 750ml of water but if you have fresh stock to hand, obviously use that.

Simmer until the beans are soft, about 10 minutes. Then allow to cool a bit before blending with a stick blender until it’s about 3/4 blended. You want it mostly smooth but still with a few chunks for texture.

Don’t be impatient, like me, and blend it whilst it’s still roasting hot or your stick blender won’t be very happy. Trust me, i speak from experience…

Poor little thing, i don’t think it’ll ever be quite the same.

Once the soup’s blended, return it too the heat and simmer until it reaches a consistency you like.

Fry some cubes of chorizo until golden and crisp, crumble up some feta and slice some spring onions and pile on top of your soup. Don’t scrimp on the toppings as they make an already delicious soup sooooo much better.